• Skip to primary navigation
  • Skip to main content
  • Skip to footer

Stickytapeandstring

Created with WordPress managed by 1&1

  • Craft projects
    • craft business tips
    • craft blog
    • Crochet patterns
    • Upcycling
    • craft with kids
  • Blogging
    • New to blogging
    • Blog diary
  • Bullet Journal
  • About me
  • Welcome!!

Free pattern

Full Heart Crochet Block

April 19, 2019 by A_Sticky_tape_and_string_girl Leave a Comment

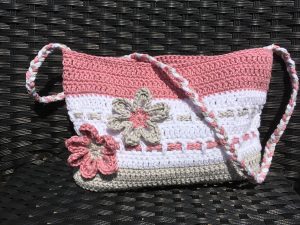
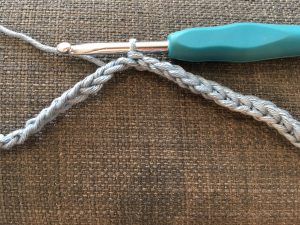
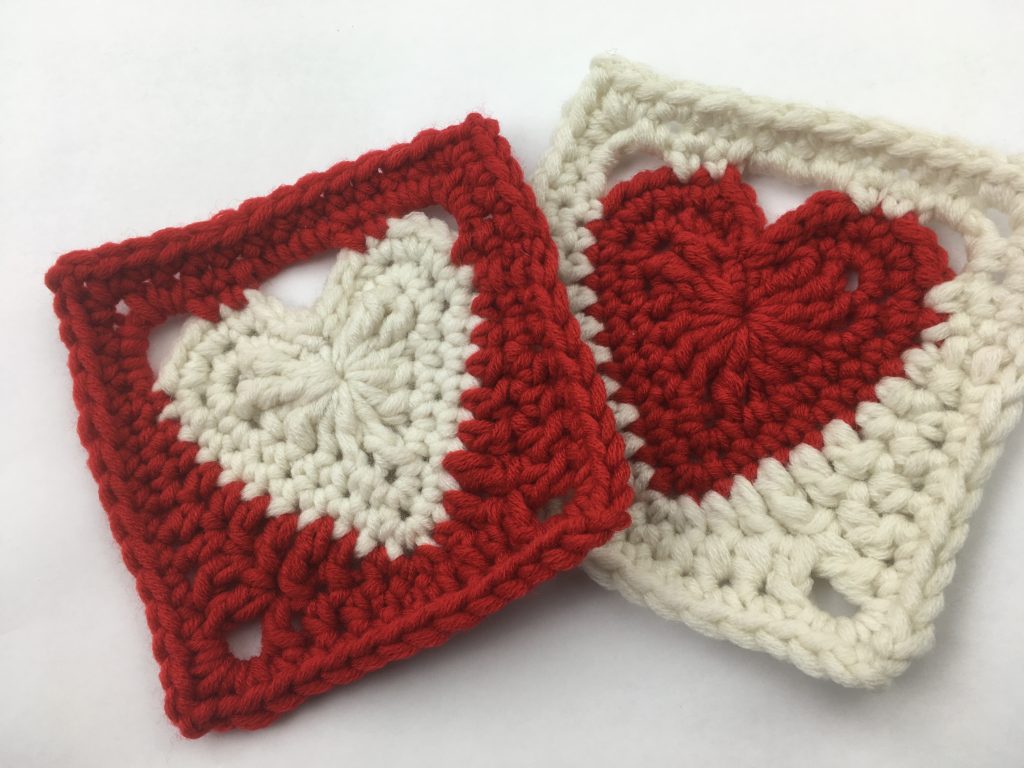
This pattern builds on a heart motif. The basic pattern for my crochet heart can be found here. This pattern uses a slightly adapted version and then puts that heart into the centre of a crochet block. You can use the crochet block to make blankets or cushion covers in any design you like!

The pattern is shown below in both UK and US versions.
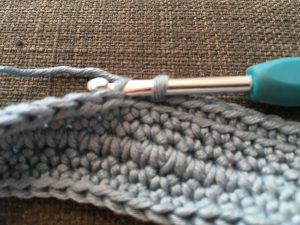
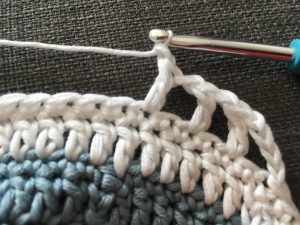
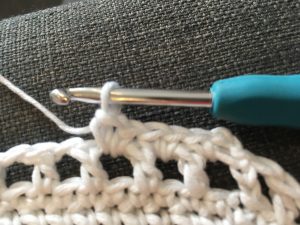
Heart Motif

UK terms

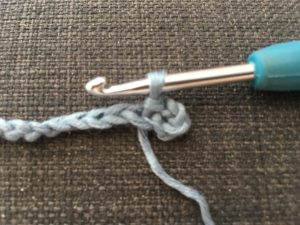
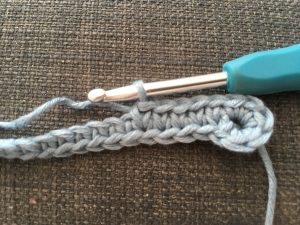
First round – Make a magic loop, chain 3. Working into the magic loop, 3 dtr, 3tr, chain 1, 1dtr, chain 1, 3tr, 3dtr, chain 2. Slip stitch into magic loop and pull the thread to close the centre of the heart.

Second round – 2 sl stitch into the gap behind the three chain from the first round.  Work 3dc into the next stitch (top of the left side of the heart). Work 3 dc into the next stitch and 2 dc into the following stitch.   Work 4 dc to take you to the bottom loop of the heart.  Work 3dc into the bottom stitch of the heart then 4 dc up the right side of the heart. Work 2dc, 3dc, 2dc into the next three stitches then 2 sl stitches. Work one final slip stitch into the centre of the heart.

Third round – Work 2 slip stitches then 2dc into the next four stitches. Work 7 dc down the left side of the heart then 3dc into the bottom stitch of the heart. Work 6dc up the right hand side of the heart then 2dc into the next four stitches. Work 2 slip stitches and finish off to complete the heart.

US terms

First round – Make a magic loop then chain 3. Working into the magic loop, 3TRC, 3DC, chain 1, 1TRC, chain 1, 3DC, 3TRC. Chain 2 and slip stitch into magic loop and pull the thread to close the centre of the heart.

Second round – 2 sl stitch into the gap behind the three chain from the first round.  Work 3SC into the next stitch (top of the left side of the heart). Work 3 SC into the next stitch and 2SC into the following stitch.   Work 4SC to take you to the bottom loop of the heart.  Work 3SC into the bottom stitch of the heart then 4SC up the right side of the heart. Work 2SC, 3SC, 2SC into the next three stitches. Work 2 sl stitches and one final slip stitch into the centre of the heart.

Third round – Work 2 slip stitches then 2SC into each of the next four stitches. Work 7 SC, then 3SC into the bottom stitch of the heart. Work 6SC up the right side of the heart then 2SC into each of the next four stitches. Work 2 slip stitches and finish off to complete the heart.

Now you should have a heart motif ready to be placed in the centre of a block.

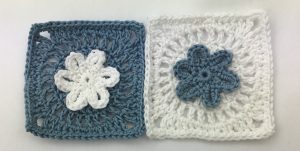
Putting the Heart into a Crochet Block

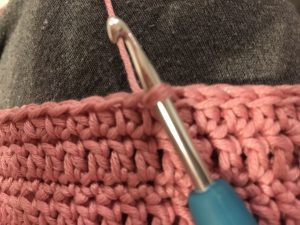
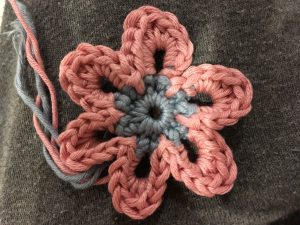
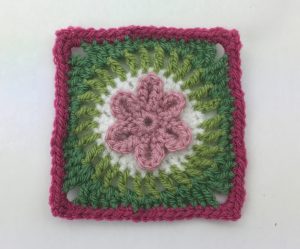
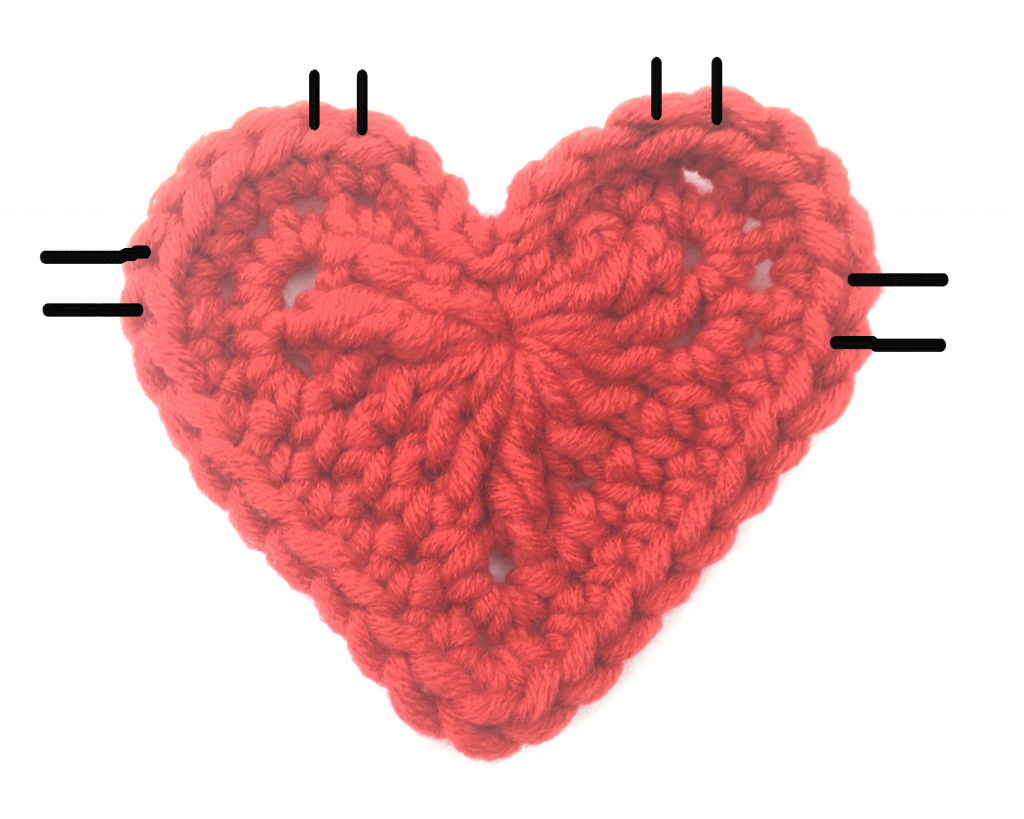
The instructions below start with the heart motif and a second yarn colour. The block is more open at the top to show the heart shape better. This picture shows the ‘touch points’ of the outer square on the heart at the top.

UK Terms

First round – counting the bottom DC as 1, count stitches up the right hand side of the heart. Join yarn in to stitch 10 and work 2CH, 1DC into next stitch then 4CH. Miss the next three stitches and work 2DC into the top of the right hand side of the heart. Work 4CH and 2DC into the top of the let hand side of the heart. Work 4CH. Miss the next three stitches and work 3DC into the left hand side of the heart. Complete the round as follows: 2HTR, 2TR, 1DTR, 1TR, 1HTR. Work 3DC into the stitch at the bottom of the heart, 1HTR, 1TR, 1DTR, 2TR, 2HTR, 1DC and join with a slip stitch to the 2CH at the start of the round.

Second round – CH2, 1DC then working into corner chain 2DC, 2CH, 2DC. Work 2DC into the stitches joined to top of right side of the heart. Work 3 DC into the chain at the top of the heart. Work 2DC into the stitches at the top of the left side of the heart. Working into the corner chain 2DC, 2CH, 2DC. Work down the left side of the heart, 4DC, 2HTR, 1TR. Into the next stitch work 1TR, 2CH, 1TR. Carry on round the bottom of the heart as follows: 2HTR, 3DC, 2HTR. Into the next stitch work 1TR, 2CH, 1TR. Complete the round as follows, 1TR, 2HTR, 2DC. Join with a slip stitch to the 2CH at the start of the round.

Third round – CH2 work DC into each stitch as follows; 3DC to first corner. Work 1DC, 2CH, 1DC into the corner then 11DC across the top of the block. Work 1DC, 2CH, 1DC into the second corner. Work 10 DC down the side of the block then work 2DC, 2CH, 2DC into the bottom corner. Work 9 DC across the bottom of the block. Work 2DC, 2CH, 2DC into the final corner then 6DC up the last side. Join with a slip stitch to the 2CH at the start of the round.

US Terms

First round – counting the bottom SC as 1, count stitches up the right hand side of the heart. Join yarn in to stitch 10 and work 2CH, 1SC into next stitch then 4CH. Miss the next three stitches and work 2SC into the top of the right hand side of the heart. Work 4CH and 2SC into the top of the let hand side of the heart. Work 4CH. Miss the next three stitches and work 3SC into the left hand side of the heart. Complete the round as follows: 2HDC, 2DC, 1TR, 1DC, 1HDC. Work 3SC into the stitch at the bottom of the heart. Work 1HDC, 1DC 1TR, 2DC, 2HDC, 1SC up the right side of the heat. Join with a slip stitch to the 2CH at the start of the round.

Second round – CH2, 1SC then working into corner chain 2SC, 2CH, 2SC. Work SC into the two stitches at the top of right side of the heart. Work 3 SC into the chain at the top of the heart. Work SC into the two stitches at the top of the left side of the heart . Work
2SC, 2CH, 2SC into the corner chain. Work down the left side of the heart, 4SC, 2HDC, 1DC. Into the next stitch work 1DC, 2CH, 1DC. Carry on round the bottom of the heart as follows: 2HDC, 3SC, 2HDC. Into the next stitch work 1DC, 2CH, 1DC. Complete the round as follows, 1DC, 2HDC, 2SC. Join with a slip stitch to the 2CH at the start of the round.

Third round – CH2 work SC into each stitch as follows; 3SC to first corner Work 1SC, 2CH, 1SC into the corner. Work 11SC across the top of the block and 1SC, 2CH, 1SC into the second corner. Work 10 SC down the side of the block then work 2SC, 2CH, 2SC into the bottom corner. Work 9 SC across the bottom of the block. Work 2SC, 2CH, 2SC into the final corner then 6SC up the last side. Join with a slip stitch to the 2CH at the start of the round.

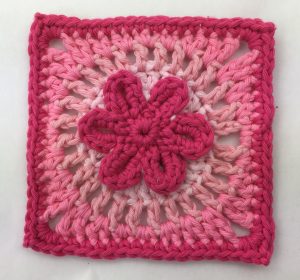
And there you have the Full Heart Block. I hope you like it! You are welcome to use it free of charge but not to resell the pattern without explicit permission. Please share photos of any projects you make using this design. If you post anything online please share a link back to this page.

Happy crocheting!

Annie 🙂

Filed Under: Crochet patterns Tagged With: crochet block, crochet heart square, crochet square, free crochet pattern, Free pattern, heart, heart square, uk and us crochet terms, uk and us instructions

Yarn Salvage #2 – more tips

September 8, 2018 by A_Sticky_tape_and_string_girl Leave a Comment

Hello, In my last post I promised you another set of tips and ‘how to points’ on yarn salvage. The project is going very well here and I am drowning a bit in yarn!

With Autumn coming on, I have also started looking at the list of people I would like to make Christmas and Birthday presents for!   I plan to use some of this new yarn stash to create beautiful things for my friends and family.   I will post a list pattern links when I have it together but as a start point I am making my striped scarf up with some of the greens and greys.

Here is a link to the Striped Scarf pattern and you can see the scarf above in pink and in blue. This type of pattern is ideal for using recycled yarn as you can vary the design according to the yarn you have available and it is easier to mix yarn weights.   Anyway – I promised you tips….. here goes.   The last set of tips focussed on garment selection.  This list is more about what to do when you get your garments home and you need to do the unravelling!   If you missed the first set of tips you can see them here – Yarn Salvage #1

Yarn Salvage Tips#2 – where to start unravelling

1. Firstly spend some time getting to know the garment.   Look at every seam and pull the two joined edges as far apart as possible.   There should be a set of horizontal stitches visible between the two pieces of the garment.   If you are lucky these stitches will be in a slightly different thread but this is not always the case.

2. Side and sleeve seams are the easiest place to start.   Snip through 3 or 4 of those horizontal joining stitches, at one end of the seam but if you’ve chosen the bottom edge, avoid the welt/rib/border.  Instead, start a little higher up.

3. As well as the hole you have created by snipping the horizontal stitches you should be able to see a cut end of yarn.   Pull on this and it might magically unravel the whole seam.   If it doesn’t, go to the other end of the same seam and try again.

4. Most seams will unravel as described above if you persevere long enough.   Beware of fluffy yarns however.   Fluffy yarns need a lot of pulling and sometimes scissor work to prise them apart.

5. If all else fails, it might be necessary to snip all horizontal stitches but this is time taking and risky.    It is very easy to snip part of the knitting which would mean you end up with smaller balls of recovered yarn and more ends to deal with in your project!

6. Sometimes the tops of sleeves and neck areas, particularly on fronts of jumpers, call for the use of scissors.   There is no point in spending ages unpicking these areas just to finish up with very short lengths of yarn.    Just cut across the knitting so that you have a reasonably long raw edge to start from.

7. Welts/ribs/borders and underarm seam intersections on some garments can be huge time wasting areas to deal with.   No matter how long you take or how careful you are, there will be cuts to the knitting in those areas.   Consider just cutting those nasty lumpy seams away with out even trying to unravel them.

8. Beware the double ball knitting demon!!   There are some commercial machines that have two balls of yarn on the go in production.    The balls are used to knit alternate rows.   This means when you are unravelling you will have two balls of yarn to wind – swapping between them every row.    You cannot know this before you unravel, at least we haven’t worked out a way to detect it yet…. but be prepared to deal with it if it occurs.

9. Take a view on whether to unravel ribbing at the neck and elsewhere.   Sometimes it is worth the effort, sometimes not.

10. Finally, it is worth saving every scrap of cut away area or rib/welt/border until you have finished the project you are using the yarn for.    You never know whether you will run out of yarn and just need a tiny bit more.  If this happens, all the bits that were too time consuming to deal with suddenly become worthwhile!!

And that is it for now.    I have a final post in this series for you next week.   In that post I will cover what we do with the yarn we recover in order to prepare it for re-use.

Happy recycling!

Annie 🙂

Filed Under: Craft projects, Upcycling Tagged With: crochet, Free pattern, gift idea, handmade, recycling yarn, scarf, stash, yarn

Yarn salvage

September 2, 2018 by A_Sticky_tape_and_string_girl Leave a Comment

Hello, I am here to share my latest obsession!    Getting lots of yarn for very little money through yarn salvage and recycling…….. what’s not to like?!

This project started with me worrying about the cost of the yarn I am using to develop projects and patterns for the blog.   Even using cheaper yarns like my well loved Drops Paris, the cost mounts up when you are making a large blanket.   Crochet seems to ‘eat’ far more yarn than knitting, or is that just me?

I gave some thought to sources of cheap yarn and began to wonder about Charity shops/Thrift stores and yarn salvage.  

Yarn Salvage and recycle!

After a bit of research I can tell you that woollen/knitted garments typically cost between £2 and £5 in these outlets.   If the yarn could be salvaged that would be quite a lot of yarn for a very low cost.   One problem is that it is the wrong season currently with warmer temperatures shops are not selling much knitwear but we still managed to find some candidate garments.

I say we because I decided to rope my Mum into this project.   I remember from my childhood that she really enjoys undoing knots and taffles.   Turns out Mum also quite likes rummaging through Charity/Thrift shops for bargain items of knitwear!   A knitter herself for many years Mum understands the construction of garments.   This is a big help when choosing pieces for yarn salvage.

We are now some way into our project.    Mum has sourced some 15 garments and we have learned which types work best and the types to avoid.    Here are our tips for garment selection.

TOP TIPS for Garment Selection when Recycling yarn

1. Look at the washing label – that gives you the yarn type, % composition wool, acrylic etc.  This info is normally on the reverse of the label

2. Inspect the seams.  The shoulders will normally be overlocked (zigzag stitching over both joined edges on the inside of the seam).   This isn’t a problem but if you see this type of seam elsewhere on the garment this usually means the knitted fabric has been cut and joined which means there will be a break in the yarn on every row.   This gives very short lengths of yarn.   Avoid!

3. Unless you fall in love with a particular yarn, go for jumpers rather than jackets/cardigans.  Jumpers are normally easier to unpick.   Jackets and cardigans can be very difficult to deal with where the front band is attached and again are sometimes cut, resulting in short lengths of yarn.

4. Look at the texture.   Unravelling thicker yarn is generally easier than the finer ones.

5. Large garments often cost the same as smaller ones as pricing tends to be per garment.   The larger the garment the greater the quantity of yarn you can recover!

Read on for more tips on garment selection

6. Charity shops are seasonal.   Many will not display knitted garments in summer but it is always worth a look.   Lighter weight items will probably still be available.

7. One you have a stock, bear in mind the colours and weight of your yarns – look for items you can combine.

8. Shops have sales.    Even though these outlets are incredibly cheap to start with there are times when they discount.   There are also sometimes discount rails where items have been in store for a time and not sold.   Keep an eye out for sales!

9. Make sure you are looking in the right kind of shop.   Shops selling vintage or retro garments will be selecting stock based on the style and age of the garment and will be charging a much higher price than the average Charity Store.

10. Do not be put off by the style of a garment.   You will not be wearing it!  An item that is not attracting buyers in its current form might be made of very attractive yarn!

Recovering the yarn

We also learnt how best to recycle the yarn and to work out what to do with the yarn we recovered.   I will cover these in a later post.

The first few garments we bought are shown in the photos below.    When you start to take the garments apart you have to be very careful not to snip the yarn.   However, if you do snip the yarn in error it just gives shorter lengths or smaller balls which can still be used – depending on the project you select.

first garment for yarn salvage project
second garment for yarn salvage project
third garment for yarn salvage project

Yarn Salvage – Unpicking the garments

The first garment we unpicked was the flecked cardigan.   This one gave me the inspiration for a blanket project.    We picked creams and browns to go with it and unpicked the other two garments shown.    These photos show the quantity of balled yarn we ended up with.   More than 1kg of yarn for £6, not bad eh? On the subject of money a bit of small print I am obliged to share. Adverts and banners in this post are affiliate links. If you click on them I might receive a small payment which supports my blog and allows me to keep posting. Right – on to the interesting stuff. CHEAP YARN and free patterns!!

yarn salvage project - recycled yarn
yarn salvage project more recycled yarn
recycled yarn from yarn salvage project

The yarn is more or less Aran weight.   I will include more on how to identify the weight in the next post.   I used to have an obsession with knitting cabled sweaters so have a lot of oddments of plain aran yarn in my stash.    Some of the oddments were in similar colours to the yellow/orange flecks in the ‘inspiration’ yarn.   I put these oddments from my stash with the salvaged yarn to give me a large enough quantity to produce a blanket.

Yarn Salvage – Using the recycled yarn!

Next in my yarn salvage project, I came up with a block pattern that I can scale up and down to make three different sizes of square.   The pattern(s) are shown at the bottom of the post.    These are some of the blocks I have completed so far.

sample squares from salvaged yarn

Finally, turning this blanket into a whole family project, my husband designed a layout for the blocks.

blanket layout of different sizes of recycled yarn squares

Here are the patterns I am using for the three sizes of block.  I might need to amend these when it comes to stitching up if the weights of the yarn result in size differences.   I will either block them to the correct size or add additional rows to increase the size!   The change of colour instruction in these patterns shows you how I am working – you can change colour whenever you like or make the blocks solid colour.   It really depends on the yarn you have from your own yarn salvage project.

Instructions in UK terms – please SCROLL DOWN for US terms

Large Square – UK terms

1st round – make a magic loop, 2Ch, 9Dc slip stitch to join to the start point
2nd round – Ch3, 2Tr in each stitch, Tr, slip stitch to join to the start point
Change colour
3rd round – Ch2, Dc in each stitch (19), slip stitch to join to the start point
4th round – Ch3, 2xTr cluster, Ch1, (3Tr cluster Ch1)x 19. Slip stitch to join to the start point
5th round – Ch2, 3HTr, (2Tr, DTr, chain 3, DTr, 2Tr, 4HTr) x 3, 2Tr, DTr, chain 3, DTr, 2Tr, slip stitch to join to the start point.
Change colour
6th round – Ch2, Htr round, 2HTr, 1Ch 2HTr, in each corner, slip stitch to join to the start point.
7th round – Ch2, Tr round 2Tr, 1Ch, 2Tr in each corner, slip stitch to join to the start point.
Change colour
8th round – Ch2, Htr round, 2HTr 1Ch 2HTr, in each corner, slip stitch to join to the start point.
9th round – Ch2, Tr round 2Tr, 1Ch, 2Tr in each corner, slip stitch to join to the start point.
Change colour
10th round – Ch2, Htr round, 2HTr, 1Ch, HTr, in each corner, slip stitch to join to the start point.
11th round – Ch2, Tr round 2Tr, 1Ch, 2Tr in each corner, slip stitch to join to the start point.
Change colour
12th round – Ch2, Htr round, 2HTr, 1Ch, 2HTr, in each corner, slip stitch to join to the start point.
13th round – Ch2, Tr round 2Tr, 1Ch, 2Tr in each corner, slip stitch to join to the start point.
Change colour
14th round – Ch2, Htr round, 2HTr, 1Ch, 2HTr, in each corner, slip stitch to join to the start point.
15th round – Ch2, Tr round 2Tr, 1Ch, 2Tr in each corner, slip stitch to join to the start point.
16th round – Ch2, Htr round, 2HTr, 1Ch, 2HTr, in each corner, slip stitch to join to the start point.
Change colour
17th round – Ch2, Htr round, 2HTr, 1Ch, 2HTr, in each corner, slip stitch to join to the start point.

Medium sized square – UK terms

1st round – Make a magic loop, 2Ch, 9Dc slip stitch to join to the start point
2nd round – Ch3, 2Tr in each stitch, Tr, slip stitch to join to the start point
Change colour
3rd round – Ch2, Dc in each stitch (19), slip stitch to join to the start point
4th round – Ch3, 2xTr cluster, Ch1, (3Tr cluster Ch1)x 19. Slip stitch to join to the start point.
5th round – Ch2, 3HTr, (2Tr, DTr, chain 3, DTr, 2Tr, 4HTr) x 3, 2Tr, DTr, chain 3, DTr, 2Tr, slip stitch to join to the start point.
6th round – Ch2, Htr round, 2HTr, 1Ch, 2HTr, in each corner, slip stitch to join to the start point.
Change colour
7th round – Ch2, Htr round, 2HTr, 1Ch, 2HTr, in each corner, slip stitch to join to the start point.
8th round – Ch2, Tr round 2Tr, 1Ch, 2Tr in each corner, slip stitch to join to the start point.
9th round – Ch2, Htr round, 2HTr, 1Ch, 2HTr, in each corner, slip stitch to join to the start point.

Small Square – UK terms

1st round – Make a magic loop, 3Ch, 15Tr, slip stitch to join to the start point.
Change colour
2nd round – Ch3, 2xTr cluster, Ch1, (3Tr cluster Ch1)x 15, slip stitch to join to the start point.
3rd round – Ch2, HTr, (2Tr, DTr, Ch3, DTr, 2Tr, 2HTr,) x 3,  2Tr, DTr, Ch3, DTr, 2Tr, slip stitch to join to the start point.
Change colour
4th round – Ch2 work Dc along each side, 2Dc, 2Ch, 2Dc in each corner, slip stitch to join to the start point.

Instructions in US terms – please SCROLL UP for UK terms

Large Square – US terms

1st round – make a magic loop, 2Ch, 9Sc slip stitch to join to the start point
2nd round – Ch3, 2Dc in each stitch, Dc, slip stitch to join to the start point
Change Colour
3rd round – Ch2, Sc in each stitch (19), slip stitch to join to the start point
4th round – Ch3, 2xDc cluster, ch1, (3Dc cluster ch1)x 19. Slip stitch to join to the start point
5th round – Ch2, 3Hdc, (2Dc, Tr, chain 3, Tr, 2Dc, 4Hdc) x 3, 2Dc, Tr, chain 3, Tr, 2Dc, slip stitch to join to the start point.
Change colour
6th round – Ch2, HDc round, 2HDc 1ch 2HDc, in each corner, slip stitch to join to the start point.
7th round – Ch2, Dc round 2Dc, 1ch, 2Dc in each corner, slip stitch to join to the start point.
Change colour
8th round – Ch2, HDc round, 2HDc 1ch 2HDc, in each corner, slip stitch to join to the start point.
9th round – Ch2, Dc round 2Dc, 1ch, 2Dc in each corner, slip stitch to join to the start point.
Change colour
10th round – Ch2, HDc round, 2HDc 1Ch 2HDc, in each corner, slip stitch to join to the start point.
11th round – Ch2, Dc round 2Dc, 1ch, 2Dc in each corner, slip stitch to join to the start point.
Change colour
12th round – Ch2, HDc round, 2HDc 1Ch 2HDc, in each corner, slip stitch to join to the start point.
13th round – Ch2, Dc round 2Dc, 1ch, 2Dc in each corner, slip stitch to join to the start point.
Change colour
14th round – Ch2, HDc round, 2HDc 1Ch 2HDc, in each corner, slip stitch to join to the start point.
15th round – Ch2, Dc round 2Dc, 1ch, 2Dc in each corner, slip stitch to join to the start point.
16th round – Ch2, HDc round, 2HDc 1Ch 2HDc, in each corner, slip stitch to join to the start point.
Change colour
17th round – Ch2, HDc round, 2HDc 1Ch 2HDc, in each corner, slip stitch to join to the start point.

Medium sized square – US terms

1st round – Make a magic loop, 2Ch, 9Sc slip stitch to join to the start point
2nd round – Ch3, 2Dc in each stitch, Dc, slip stitch to join to the start point
Change colour
3rd round – Ch2, Sc in each stitch (19), slip stitch to join to the start point
4th round – Ch3, 2xDc cluster, ch1, (3Dc cluster Ch1)x 19. Slip stitch to join to the start point.
5th round – Ch2, 3HDc, (2Dc, Tr, chain 3, Tr, 2Dc, 4HDc) x 3, 2Dc, Tr, chain 3, Tr, 2Dc, slip stitch to join to the start point.
6th round – Ch2, HDc round, 2HDc, 1Ch, 2HDc, in each corner, slip stitch to join to the start point.
Change colour
7th round – Ch2, HDc round, 2HDc, 1Ch, 2HDc, in each corner, slip stitch to join to the start point.
8th round – Ch2, Dc round 2Dc, 1Ch, 2Dc in each corner, slip stitch to join to the start point.
9th round – Ch2, HDc round, 2HDc, 1Ch, 2HDc, in each corner, slip stitch to join to the start point.


Small Square – US terms


1st round – Make a magic loop, 3Ch, 15Dc, slip stitch to join to the start point.
Change colour
2nd round – Ch3, 2xDc cluster, Ch1, (3Dc cluster Ch1)x 15, slip stitch to join to the start point.
3rd round – Ch2, HDc, (2Dc, Tr, Ch3, Tr, 2Dc, 2HDc,) x 3,  2Dc, Tr, ch3, Tr, 2Dc, slip stitch to join to the start point.
Change colour
4th round – Ch2 work Sc along each side, 2Sc, 2Ch, 2Sc in each corner, slip stitch to join to the start point.

And that is it from me.   I hope you enjoy rooting around for knit wear to recycle and yarn salvage!   Please share your stories.    Happy crocheting!

Annie 🙂

Filed Under: Craft projects, Upcycling Tagged With: blankets, crochet, crochet blocks, design, Free pattern, frugal, handmade, recycling, salvage, stash buster, stash busting, yarn

Daisy bag

August 26, 2018 by A_Sticky_tape_and_string_girl Leave a Comment

This bag was designed on my daily commute.   I love the fresh look with white cotton and picked the colours my daughter liked but the colour way is entirely up to you!

The finished bag measures 10 inches by 7 inches or 25cm by 18cm.   I put on one shoulder strap but it would easily convert to two smaller handles if you prefer.   I have included instructions for both.

The yarn I have used here is Drops Muskat a mercerized cotton which gives great stitch definition and a firm finish that should not stretch with use.   It works up on a 4mm hook and is very good quality/value.   I paid £1.45 per 50g ball.

Daisy Bag instructions – UK terms  (SCROLL DOWN FOR US TERMS!)

The pattern uses a 4mm hook and three colours of yarn.   For the example in the photo I used:

Yarn A – Drops Muskat – colour 19 – Light Grey

Yarn B – Drops Muskat – colour 18 – White

Yarn C – Drops Muskat – colour 06 – Light Pink

Starting with Yarn A – Light Grey

Base – Chain 5 stitches, slip stitch into the first chain to form a loop.  Chain 35.   slip stitch into the fifth stitch from the hook to form a second loop.

1st round – This is the only real fiddly bit so it is worth taking your time.  Chain 2, DC 30 along the straight chain.  Take care not to let the chain twist as you work it.   Don’t worry if you have to pull it out a couple of times to get it right (I did!).   Work 6DC into the end loop, DC 30 along the straight chain working into the DC’s from the first part of the round.   This gives a strong bottom to the bag.   your work should look like the photo’s below.   Finally – work 6 DC into the end loop and join with a slip stitch to your start point for the round.

2nd round – Chain 2, DC 31, work 2DC into each of the middle four of the six DCs you worked into the loop of the base.  DC 32, work 2DC into the middle four of the six DCs you worked into the second loop of the base.  1 DC, slip stitch to join to the start point of the round.

3rd round – Chain 2, DC 32, work 2DC into the next 6 stitches, DC 35, work 2 DC into the next 6 stitches, 1DC, slip stitch to join to the start point of the round.

The base of the bag is now complete!!  If you would like a bigger base – repeat the row above, adjusting the increase round the ends of the base to allow the work to lie flat.

4th round – Chain 2.   DC into every stitch BUT – only pick up the back of the stitch.  See photo below.   This creates a line that will form the edge of the bottom of the bag.

5th round – Chain 2, Tr into each stitch on the row below.   Slip stitch to join to the top of the three chains that started the round.   Note – lots of patterns would say to chain three before a round  of Trebles but I find that chain 2 works better for me and gives a neater finish.   It might be worth trying both versions to see what suits you best.

6th round – Chain 2, DC into each stitch on the row below.   Slip stitch to join to the top of the two chains that started the round.

7th round – repeat the 5th round working Trebles

8th round – repeat the 6th round working DCs

9th round – repeat the 5th round working Trebles

10th round – repeat the 6th round working DCs

Change colour!   Working with Yarn B – White –   I normally try to join in the yarn on the end of the bag so that the start of each row is not in the middle of the flat part where they are more visible.

11th round – repeat the 5th round working Trebles

12th round – repeat the 6th round working DCs

13th round – This round creates the ‘holes’ that we will later weave the bands through.  Chain 4, (miss one stitch and work Treble into the next, chain 1)  repeat to end of round.  Join with a slip stitch to the third of the four chains that started the round.

14th round – Chain 2, work one  DC into the ‘hole’ on the previous row.  Continue by working 2DC into each of the ‘holes’ created in the previous round.  Join with a slip stitch to the second of the two chains that started the round.

15th round – repeat the 5th round working Trebles

16th round – repeat the 6th round working DCs

17th round – repeat the 13th round, creating the holes.

18th round – repeat the 14th round working DCs into the ‘holes’.

19th round – repeat the 5th round working Trebles

20th round – repeat the 6th round working DCs

Change colour!   Working with Yarn C – Light Pink

21st round – repeat the 6th round working DCs

22nd round – repeat the 5th round working Trebles

23rd round – repeat the 6th round working DCs

24th round – repeat the 5th round working Trebles

25th round – repeat the 6th round working DCs

26th round – repeat the 5th round working Trebles

27th round – Chain 2, Htr into each stitch on the row below.   Join with a slip stitch to the second of the two chains that started the row.

28th round – Slip stitch into each stitch on the round below to create the decorative edge.   Join to the start point with a slip stitch and this completes the main part of the bag.

Creating the ‘ribbons’ that weave through the bag.

To create the two ribbons that you will weave in and out of the ‘holes’ in the bag, first take yarn A – Light Grey and make a chain 102 stitches long.

Slip stitch into the third stitch from the hook and keep going with a slip stitch into each chain until you get back to the start point.    Pull both ends through the loop on the hook to finish off, leaving the two ends which you will use to stitch up the ribbon.

Work the second ribbon in the same way but in yarn C – Light Pink.

Creating the flower decorations.

First Flower – Working with Yarn A – Light Grey.   

1st round – Make a magic loop then Chain 2, DC 11.  Join to form a disc.

2nd round – (Chain 6 slip stitch into the row below at the base of the chain.   Slip stitch into next stitch) repeat six times.   This will give you a disc with six chain stitch loops that will form the basis of the petals.

Change colour! – working with Yarn C – Light Pink

3rd round – (working into one of the chain stitch loops, 3 DC, 1 Htr, 1Tr, 1HTr, 3DC.  work one slip stitch into the stitch on the row below between the chain stitch petals), repeat six times until you have a full set of six petals.   You have a finished flower!

Second Flower – Now work the flower again switching round the two yarn colours.

Assemble the bag by slotting the ribbon through the ‘holes’.    I chose to put the Pink ribbon closest to the bottom and near to the Grey section of the bag.    If you weave the ribbon in and out of the holes over and under the Trebles that form the holes you should find you come back to the start with two ‘unders’ side by side.    This is probably easier to see in the photo below than it is to understand my explanation!

Join the two ends of ribbon at this point and then attach the flower over the top of the join, between the two places that the ribbon was woven under the bars.    I used the flower with the Light Pink petals at the bottom of the bag next to the section that was made in Light Grey.   ie use the flower with petals in Yarn C against the ribbon in Yarn C.

Finally – Adding Handles or Strap.  

To finish the bag you need to decide whether you would like a shoulder strap or twin handles.    The start point for both is to create ribbons as above.    Each strap or handle needs three ribbons which are plaited.

The ribbon length I used to create the shoulder strap was 202 chain.

The ribbon length I used to create each handle was 82 chain.

Work three ribbons – one in each colour.    Attach the three ribbons to each other at one end.   Note – if you use two of the ribbons the same way around and one the opposite way round you will have ends of yarn at both ends of the plait, this will help with the stitching up.   


Using the ends of yarn from each ribbon stitch the handles into the bag – and you are done!!   

I hope you enjoyed this pattern.   Please let me know.    US terms follow.

Daisy Bag instructions – US terms

The pattern uses a 4mm hook and three colours of yarn.   For the example in the photo I used:

Yarn A – Drops Muskat – colour 19 – Light Grey

Yarn B – Drops Muskat – colour 18 – White

Yarn C – Drops Muskat – colour 06 – Light Pink

Starting with Yarn A – Light Grey

Base – Chain 5 stitches, slip stitch into the first chain to form a loop.  Chain 35.   slip stitch into the fifth stitch from the hook to form a second loop.

1st round – This is the only real fiddly bit so it is worth taking your time.  Chain 2, SC 30 along the straight chain.  Take care not to let the chain twist as you work it.   Don’t worry if you have to pull it out a couple of times to get it right (I did!).   Work 6SC into the end loop, SC 30 along the straight chain working into the SC’s from the first part of the round.   This gives a strong bottom to the bag.   your work should look like the photo’s below.   Finally – work 6 SC into the end loop and join with a slip stitch to your start point for the round.

2nd round – Chain 2, SC 31, work 2SC into each of the middle four of the six SCs you worked into the loop of the base.  SC 32, work 2SC into the middle four of the six SCs you worked into the second loop of the base.  1 SC, slip stitch to join to the start point of the round.

3rd round – Chain 2, SC 32, work 2SC into the next 6 stitches, SC 35, work 2 SC into the next 6 stitches, 1SC, slip stitch to join to the start point of the round.

The base of the bag is now complete!!  If you would like a bigger base – repeat the row above, adjusting the increase round the ends of the base to allow the work to lie flat.

4th round – Chain 2.   SC into every stitch BUT – only pick up the back of the stitch.  See photo below.   This creates a line that will form the edge of the bottom of the bag.

5th round – Chain 2, DC into each stitch on the row below.   Slip stitch to join to the top of the three chains that started the round.   Note – lots of patterns would say to chain three before a round  of DC but I find that chain 2 works better for me and gives a neater finish.   It might be worth trying both versions to see what suits you best.

6th round – Chain 2, SC into each stitch on the row below.   Slip stitch to join to the top of the two chains that started the round.

7th round – repeat the 5th round working DCs

8th round – repeat the 6th round working SCs

9th round – repeat the 5th round working DCs

10th round – repeat the 6th round working SCs

Change colour!   Working with Yarn B – White –   I normally try to join in the yarn on the end of the bag so that the start of each row is not in the middle of the flat part where they are more visible.

11th round – repeat the 5th round working DCs

12th round – repeat the 6th round working SCs

13th round – This round creates the ‘holes’ that we will later weave the bands through.  Chain 4, (miss one stitch and work DC into the next, chain 1)  repeat to end of round.  Join with a slip stitch to the third of the four chains that started the round.

14th round – Chain 2, work one  SC into the ‘hole’ on the previous row.  Continue by working 2SC into each of the ‘holes’ created in the previous round.  Join with a slip stitch to the second of the two chains that started the round.

15th round – repeat the 5th round working DCs

16th round – repeat the 6th round working SCs

17th round – repeat the 13th round, creating the holes.

18th round – repeat the 14th round working SCs into the ‘holes’.

19th round – repeat the 5th round working DCs

20th round – repeat the 6th round working SCs

Change colour!   Working with Yarn C – Light Pink

21st round – repeat the 6th round working SCs

22nd round – repeat the 5th round working DCs

23rd round – repeat the 6th round working SCs

24th round – repeat the 5th round working DCs

25th round – repeat the 6th round working SCs

26th round – repeat the 5th round working DCs

27th round – Chain 2, HDC into each stitch on the row below.   Join with a slip stitch to the second of the two chains that started the row.

28th round – Slip stitch into each stitch on the round below to create the decorative edge.   Join to the start point with a slip stitch and this completes the main part of the bag.

Creating the ‘ribbons’ that weave through the bag.

To create the two ribbons that you will weave in and out of the ‘holes’ in the bag, first take yarn A – Light Grey and make a chain 102 stitches long.

Slip stitch into the third stitch from the hook and keep going with a slip stitch into each chain until you get back to the start point.    Pull both ends through the loop on the hook to finish off, leaving the two ends which you will use to stitch up the ribbon.

Work the second ribbon in the same way but in yarn C – Light Pink.

Creating the flower decorations.

First Flower – Working with Yarn A – Light Grey.

1st round – Make a magic loop then Chain 2, SC 11.  Join to form a disc.

2nd round – (Chain 6 slip stitch into the row below at the base of the chain.   Slip stitch into next stitch) repeat six times.   This will give you a disc with six chain stitch loops that will form the basis of the petals.

Change colour! – working with Yarn C – Light Pink

3rd round – (working into one of the chain stitch loops, 3 SC, 1 HDC, 1DC, 1HDC, 3SC.  work one slip stitch into the stitch on the row below between the chain stitch petals), repeat six times until you have a full set of six petals.   You have a finished flower!

Second Flower – Now work the flower again switching round the two yarn colours.

Assemble the bag by slotting the ribbon through the ‘holes’.    I chose to put the Pink ribbon closest to the bottom and near to the Grey section of the bag.    If you weave the ribbon in and out of the holes over and under the DCs that form the holes you should find you come back to the start with two ‘unders’ side by side.    This is probably easier to see in the photo below than it is to understand my explanation!

Join the two ends of ribbon at this point and then attach the flower over the top of the join, between the two places that the ribbon was woven under the bars.    I used the flower with the Light Pink petals at the bottom of the bag next to the section that was made in Light Grey.   ie use the flower with petals in Yarn C against the ribbon in Yarn C.

Finally – Adding Handles or Strap.

To finish the bag you need to decide whether you would like a shoulder strap or twin handles.    The start point for both is to create ribbons as above.    Each strap or handle needs three ribbons which are plaited.

The ribbon length I used to create the shoulder strap was 202 chain.

The ribbon length I used to create each handle was 82 chain.

Work three ribbons – one in each colour.    Attach the three ribbons to each other at one end.   Note – if you use two of the ribbons the same way around and one the opposite way round you will have ends of yarn at both ends of the plait, this will help with the stitching up.

Using the ends of yarn from each ribbon stitch the handles into the bag – and you are done!!

I hope you enjoyed this pattern.   Please let me know.

Happy Crocheting!

Annie 🙂

Filed Under: Craft projects, Crochet patterns Tagged With: bags, basic, beginner, commuter crochet, cotton, crafts, crochet, design, easy, Free pattern, gift, handmade, kids, small bags, small crafts, yarn

Daisy block

July 21, 2018 by A_Sticky_tape_and_string_girl Leave a Comment

Here is the pattern for my latest block design.   I have worked up a few examples, playing with colours and yarn types.   I plan to add a row of these to my spring flowers blanket.   This is the block worked up in those colours using Stylecraft DK yarn and a 4mm hook.

I love playing with an ombré effect.   Here is the block using shades of pink radiating from a white centre.   The white can only be seen from the back!   The yarn here is Drops Paris worked on a 5mm hook.

Here are a couple of the blocks in Drops Muskat, back on a 4mm hook.  One has a coloured flower against a white background.   I really like the sheen on this yarn.   I will put a proper review into my next blog update.   I think a baby blanket with coloured flowers against white would be sweet.   The photo also shows the reverse with white flowers on blue.   You can see I became quite attached to this design quite quickly!

Here is the pattern 

Daisy block – UK terms

Foundation round 1 – Make a magic loop, chain 2, 11 DC into the loop, pull closed and join with a slip stitch

Round 2 – (chain 6, slip stitch into the root of the chain to form a loop, slip stitch into the next 2 stitches) x 5, chain 6, slip stitch into the root of the chain to form a loop, slip stitch into the base of the first chain loop. You should have a circle with six loops.

Round 3 – (7 DC into the first six chain loop, slip stitch into the stitch between loops) x 6, slip stitch to join to start point. You should have six petals.

Round 4 – (chain three, slip stitch into the stitch between the petals) x 6, slip stitch to join to the start point. Tip – These chains need to sit behind the petals but will probably be in front as you work them. Don’t worry, you can pull the petals back through at the end of the round.

Round 5 – (work 3 DC into the three chain loop, 1CH) x 6, slip stitch to join to start point.

Round 6 – chain 3, 2 Tr, (2Tr into the chain space, 3 Tr) x 2, 1Tr into the chain space, (3Tr, 2Tr into the chain space) x 2, 3Tr, 1Tr into the chain space. Join with a slip stitch to the top of the starting 3 chains.

Round 7 – chain 4, (Tr, chain 1) x 27, join with a slip stitch to the third chain in the 4 chains that started the round.

Round 8 – this is where we square the circle! Ch2, DC into the first chain space. Complete the round by working two stitches into each chain space as follows: (DC HTr, HTr Tr, Tr DTr, 2 chain, DTr Tr, Tr HTr, HTr DC, 2DC) x 3, DC HTr, HTr Tr, Tr DTr, 2 chain, DTr Tr, Tr HTr, HTr DC, slip stitch to join to the top of the two chains the started the round.

Round 9 – 2ch, work DC into each stitch. At the corners work 2DC, 2ch, 2DC into the two chain space. At the end of the round join with a slip stitch to the top of the two chains the started the round. And you are done! Sit back and admire or plan the project you are going to make with this lovely little block!

Daisy block – US terms

Foundation round 1 – Make a magic loop, chain 2, 11 SC into the loop, pull closed and join with a slip stitch

Round 2 – (chain 6, slip stitch into the root of the chain to form a loop, slip stitch into the next 2 stitches) x 5, chain 6, slip stitch into the root of the chain to form a loop, slip stitch into the base of the first chain loop. You should have a circle with six loops.

Round 3 – (7 SC into the first six chain loop, slip stitch into the stitch between loops) x 6, slip stitch to join to start point. You should have six petals.

Round 4 – (chain three, slip stitch into the stitch between the petals) x 6, slip stitch to join to the start point. Tip – These chains need to sit behind the petals but will probably be in front as you work them. Don’t worry, you can pull the petals back through at the end of the round.

Round 5 – (work 3 SC into the three chain loop, 1CH) x 6, slip stitch to join to start point.

Round 6 – chain 3, 2 DC (2DC into the chain space, 3 DC) x 2, 1DC into the chain space, (3DC, 2DC into the chain space) x 2, 3DC, 1DC into the chain space. Join with a slip stitch to the top of the starting 3 chains.

Round 7 – chain 4, (DC, chain 1) x 27, join with a slip stitch to the third chain in the 4 chains that started the round.

Round 8 – this is where we square the circle! Ch2, SC into the first chain space. Complete the round by working two stitches into each chain space as follows: (SC HDC, HDC DC, DC TR, 2 chain, TR DC, DC HDC, HDC SC, 2SC) x 3, SC HDC, HDC DC, DC TR, 2 chain, TR DC, DC HDC, HDC SC, slip stitch to join to the top of the two chains the started the round.

Round 9 – 2ch, work SC into each stitch. At the corners work 2SC, 2ch, 2SC into the two chain space. At the end of the round join with a slip stitch to the top of the two chains the started the round. And you are done!

I hope you enjoy this pattern as much as I enjoyed creating it.   Happy crocheting!

Annie 🙂

Filed Under: Craft projects, Crochet patterns Tagged With: crochet block, flower block, Free pattern, ombre, uk and us instructions, yarn

Crochet blog – update #6

July 1, 2018 by A_Sticky_tape_and_string_girl Leave a Comment

Hello and welcome to my sixth update!   This week I made more progress on my blanket project.   I realised I have been calling it different names as is has progressed.   It started life as my Shades of the Rainbow blanket but more recently I have been calling it Hearts and Spots!   Whatever name it ends up with I have to confess, I am ready to move on… I have never been great at finishing things but this blog acts as a conscience so I will get it done!

This photo shows four more completed rows of squares.   Only four more to go and I can start the making up.   I have already made the majority of the blocks for those last four rows but still need to fasten off the ends.

I started to look into pricing of this project, researching on Etsy and google for similar items and found a huge range of pricing.   Some of it was incredibly low and looks to cover the cost of materials at best.   This got me thinking!   I built myself a little spreadsheet to calculate the cost of producing the blanket.   I know what the yarn cost including shipping and I used the UK minimum wage to value my time. The blanket isn’t finished yet but when it is I will know what I should be charging. The spreadsheet has a section to record the number of hours worked.   I think I will use one for every project from now on.   I created it as a PDF and set up a FREE DOWNLOAD HERE.   Pricing basics (25882 downloads )   I wrote a longer post on pricing which you can read here – pricing basics.

As a break from my big project this week I designed this new block in the picture above.   I have made it up in a few colours with some of my left over scraps. I am very pleased with the way it turned out.   Here is a link to the FREE PATTERN. There are no complicated stitches so it should be suitable for beginners.   I have listed the instructions in both UK and US notation.   I haven’t decided on my next big project but I would quite like to make a blanket with this block.   I worked it in Drops Paris yarn on a 5mm hook and the finished blocks are about 14cms square.

The problem with these little side projects is that they hold up work on the main project.   I do tend to get a bit distracted by new things.   Confession time, I have three other side projects on the go.   I am working on a cushion design, a summer top and a shoulder bag design.   The good news is that I will be able to share those patterns with you soon I hope.

For now it is back to finishing of little Hearts and Spots squares.   I hope you have a good week. Happy crocheting!

Annie 🙂

Filed Under: craft blog, Craft projects Tagged With: blankets, blocks, commuter crochet, cotton, Craft, crochet, design, Free pattern, handmade, squares, stash, stash busting

  • « Go to Previous Page
  • Page 1
  • Page 2
  • Page 3
  • Page 4
  • Page 5
  • Page 6
  • Go to Next Page »

Footer

Newsletter

Copyright © 2026 · Genesis Sample on Genesis Framework · WordPress · Log in